Fai_D_Fluorite
Joined:
Last Activity:
0 member views + 0 guest views
23 followers / 3 following
Just here for the ride!
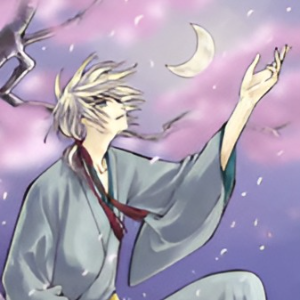
I love anything Clamp. TRC, XXXHolic, and Yui(Fai) are my favorite😌
Music-wise, I am a Yuki Kajiura person. And Kalafina. Pure Art.
.
Ok, here is the pattern for my crochet Uriel doll. I hope it is relatively easy to understand- if anyone does actually make it, I would love to see pictures! 🥹🙏💜
*I myself will use this pattern often, so I will continue to improve it. If you see any mistakes, let me know!
Reference photos at the end!
I used beige, black, light yellow, and dark yellow yarn. I indicated these for each respective body part.
The extra supplies I used are safety eyes, wire, embroidery thread, rhinestones, a sequin cutout, and a chain (though I would have preferred to use a string of gold beads).
.
☆HEAD- beige, yellow(L)
.
R1: 6sc in round
R2: 6inc
R3: (1sc, 1inc)x6
R4: (2sc, 1inc)x6
R5: (4sc, 1inc)x4, 4sc
R6: (6sc, 1inc)x4
R7: (8sc, 1inc)x3, 1dec, 1sc, 1dec
R8: 2sc, 1dec, 13sc, 1dec, 14sc
R9-10: 31sc
R11: (6sc, 1dec)x3, 5sc, 1dec
.
The part of the head that has a more sudden curve inwards (near the stitch marker) is the bottom. Also keep in mind that the head will be tilting forward in the finished product. Insert eyes between rounds 4 and 5 (counting upwards from the center.) Begin to stuff. Change color to light yellow in the first stitch of round 12.
.
R12: (6sc, 1dec)x3, 3sc
R13: (3sc, 1dec)x4, 2sc, 1dec
R14: (1sc, 1dec)x6, 1sc
.
Finish stuffing.
.
R15: 6dec, dec last stitch with first stitch in next round. Sew shut, fasten off.
.
Embroider eyelashes and mouth with black yarn, eyebrows with light yellow.
.
☆BODY- beige
.
R1: 6sc in round
R2: 6inc
R3: (1sc, 1inc)x6
R4: 3sc, 1inc, (2sc, 1inc)x2, (3sc, 1inc)x2
R5: 5sc, 1inc, 4sc, 1inc, (5sc, 1inc)x2
R6-7: 27sc
R8: 11sc, 1dec, 10sc, 1dec, 2sc
R9: 10sc, 1dec, 9sc, 2dec
R10: (3sc, 1dec)x4, 2sc
R11: (3sc, 1dec)x3, 1sc, 1dec
R12: 2sc, 1dec, 5sc, 1dec, 3sc
.
Stuff.
.
R13-14: 12sc
R15: 12sc, 1ch (begin to work backwards), 4sc
.
Finish stuffing- leave top open- and finish off.
.
☆ARMS- beige
.
R1: 5sc in round
R2: 5inc
R3-6: 10sc
R7: (1dec, 3sc)x2
R8: 8sc
R9: (2sc, 1dec)x2
R10: 6sc
.
Fasten off. Stuff.
.
Make two.
.
☆LEGS- beige
.
R1: 5sc in round
R2: 5inc
R3-8: 10sc
R9: (1dec, 3sc)x2
R10: 8sc
R11: (2sc, 1dec)x2
R12: 6sc
.
Fasten off. Stuff. Make two.
.
☆EARS- beige
.
R1: 5sc in round
R2: 4inc
.
Fasten off, leave tail for sewing. Make two.
.
☆WINGS- white
.
R1: 8ch
R2: 8sc
R3: 6sc (full stop, chain that 1, and turn around)
R4: 6sc
R5: 4sc
R6: 4sc
Chain 1, then turn to the inner side of the wing, the one that will attach to the body. 2dec, 1ch, and 8sc along the first and longest feather. Fasten off, leave long tail for sewing.
.
Make four (to sew together to make two).
.
Sew two and two together, tucking the tails inside. Stuff as you go.
.
☆HAIR(BANGS)- yellow(L)
.
Of course, when working in rows, chain an extra at the end of each row.
.
R1: 8ch
R2: 8sc
Fasten off.
Make nine.
.
☆HAIR(LOCKS)- yellow(L)
.
R1: 25ch
R2: 8inc, 17sc
Fasten off.
Make eight.
.
*Encourage the gentle curl that continues upwards on each lock, it turns out so pretty😊
.
☆AHOGE- yellow(L)
.
R1: 7ch
R2: 1sc, 2dec, 2sc
Fasten off.
.
☆BRAID-yellow(L), black
.
Take two pieces of yarn, about three and a half feet each. Chain the whole thing. Make two pieces that are yellow only, and one that is yellow and black.
Tie the tails of the three pieces together, and braid them together until the braided piece is long enough to cross the yellow patch on the head. Trim and glue the excess to whichever side you designate to be the braid's back.
For the bun, start from the top of the braid's center and single crochet a circle (reference my photos). Sc another round, add a bit of stuffing, and dec all around. Finish off.
.
☆HAIR RIBBONS- black
.
For the bun ribbon: 18-20sc. Glue the center on top of the bun, the ends underneath.
For the bow ribbon: 70-80+sc; make it as long as you like. Then just tie it into a bow shape. You can cover the ends in a bit of nail polish so they don't get loose.
.
☆BELT- yellow(D)
.
30sc
.
☆HALO- yellow(D)
.
27sc. Insert a wire into the chain, and bring about a quarter of an inch out the other side. Curl the wired yarn into a circle, 1sc to tie the ends together, and hook that sticking out piece of wire onto the nearest loop of yarn. Then take the rest of the wire coming out from the other side and bend it into an 'L' shape so it can be attached the the head.
.
☆DRESS

These are the shapes I used. You could print it out and is it as a template, but I would recommend making your own since yarn and hook size will mean a lot in determining dress size.
Seal the ends of the fabric (nail polish or special fabric sealer for cotton, melting over a flame for polyester), and decorate the edge.
.
☆☆☆ASSEMBLY
.
Sew the body to the head- the longer part of the neck should be on the bottom and at round 8 (of the head). Sew the ears one round before the yellow patch, at eye level. Sew the arms pointing towards the eyes and mouth, and the legs at the bottom of the body. Sew the wings to the back. Glue the front part of the dress on, starting with the top, and line up the sides so they are straight (so that it fans out a little). Attach the back piece right below the wings, and glue the sides onto the front sides (tucking in any edges). Glue the long thin parts of the sleeves under where the arm is attached. Wrap the collar around the neck and glue the long thin parts where the sleeves are glued. Attach the extra black strip on the back between the wings. I took the pieces of chain and glued them to the center of the waist, brought them around each side and glued the other ends on the back. I added the belt around the waist, over the chain glue spots, to the back. Finally, I added the sequin cutout to the center of the belt.
Onto the hair! Glue the bang pieces one round into the yellow head patch, starting from the ear: 3 on the left, center, and right. Take the bun part of the braid and glue it onto the center of the head right behind the bangs, and secure the rest of the braid behind the respective ears. As for the locks, them right below the braid: 2 on the left, 4 in the center (between the wings), 2 on the right. Glue the ahoge on the left in between the bun and the bangs. Glue the center of the black bow right under the hair bun. Take the L shaped wire from the halo and insert it (with some glue, of course) into the bottom of the bun, so that it faces forwards. Finally, add the pink cheeks! I dabbed color pencil dust mixed with water using my finger.
I love anything Clamp. TRC, XXXHolic, and Yui(Fai) are my favorite😌
Music-wise, I am a Yuki Kajiura person. And Kalafina. Pure Art.
.
Ok, here is the pattern for my crochet Uriel doll. I hope it is relatively easy to understand- if anyone does actually make it, I would love to see pictures! 🥹🙏💜
*I myself will use this pattern often, so I will continue to improve it. If you see any mistakes, let me know!
Reference photos at the end!
I used beige, black, light yellow, and dark yellow yarn. I indicated these for each respective body part.
The extra supplies I used are safety eyes, wire, embroidery thread, rhinestones, a sequin cutout, and a chain (though I would have preferred to use a string of gold beads).
.
☆HEAD- beige, yellow(L)
.
R1: 6sc in round
R2: 6inc
R3: (1sc, 1inc)x6
R4: (2sc, 1inc)x6
R5: (4sc, 1inc)x4, 4sc
R6: (6sc, 1inc)x4
R7: (8sc, 1inc)x3, 1dec, 1sc, 1dec
R8: 2sc, 1dec, 13sc, 1dec, 14sc
R9-10: 31sc
R11: (6sc, 1dec)x3, 5sc, 1dec
.
The part of the head that has a more sudden curve inwards (near the stitch marker) is the bottom. Also keep in mind that the head will be tilting forward in the finished product. Insert eyes between rounds 4 and 5 (counting upwards from the center.) Begin to stuff. Change color to light yellow in the first stitch of round 12.
.
R12: (6sc, 1dec)x3, 3sc
R13: (3sc, 1dec)x4, 2sc, 1dec
R14: (1sc, 1dec)x6, 1sc
.
Finish stuffing.
.
R15: 6dec, dec last stitch with first stitch in next round. Sew shut, fasten off.
.
Embroider eyelashes and mouth with black yarn, eyebrows with light yellow.
.
☆BODY- beige
.
R1: 6sc in round
R2: 6inc
R3: (1sc, 1inc)x6
R4: 3sc, 1inc, (2sc, 1inc)x2, (3sc, 1inc)x2
R5: 5sc, 1inc, 4sc, 1inc, (5sc, 1inc)x2
R6-7: 27sc
R8: 11sc, 1dec, 10sc, 1dec, 2sc
R9: 10sc, 1dec, 9sc, 2dec
R10: (3sc, 1dec)x4, 2sc
R11: (3sc, 1dec)x3, 1sc, 1dec
R12: 2sc, 1dec, 5sc, 1dec, 3sc
.
Stuff.
.
R13-14: 12sc
R15: 12sc, 1ch (begin to work backwards), 4sc
.
Finish stuffing- leave top open- and finish off.
.
☆ARMS- beige
.
R1: 5sc in round
R2: 5inc
R3-6: 10sc
R7: (1dec, 3sc)x2
R8: 8sc
R9: (2sc, 1dec)x2
R10: 6sc
.
Fasten off. Stuff.
.
Make two.
.
☆LEGS- beige
.
R1: 5sc in round
R2: 5inc
R3-8: 10sc
R9: (1dec, 3sc)x2
R10: 8sc
R11: (2sc, 1dec)x2
R12: 6sc
.
Fasten off. Stuff. Make two.
.
☆EARS- beige
.
R1: 5sc in round
R2: 4inc
.
Fasten off, leave tail for sewing. Make two.
.
☆WINGS- white
.
R1: 8ch
R2: 8sc
R3: 6sc (full stop, chain that 1, and turn around)
R4: 6sc
R5: 4sc
R6: 4sc
Chain 1, then turn to the inner side of the wing, the one that will attach to the body. 2dec, 1ch, and 8sc along the first and longest feather. Fasten off, leave long tail for sewing.
.
Make four (to sew together to make two).
.
Sew two and two together, tucking the tails inside. Stuff as you go.
.
☆HAIR(BANGS)- yellow(L)
.
Of course, when working in rows, chain an extra at the end of each row.
.
R1: 8ch
R2: 8sc
Fasten off.
Make nine.
.
☆HAIR(LOCKS)- yellow(L)
.
R1: 25ch
R2: 8inc, 17sc
Fasten off.
Make eight.
.
*Encourage the gentle curl that continues upwards on each lock, it turns out so pretty😊
.
☆AHOGE- yellow(L)
.
R1: 7ch
R2: 1sc, 2dec, 2sc
Fasten off.
.
☆BRAID-yellow(L), black
.
Take two pieces of yarn, about three and a half feet each. Chain the whole thing. Make two pieces that are yellow only, and one that is yellow and black.
Tie the tails of the three pieces together, and braid them together until the braided piece is long enough to cross the yellow patch on the head. Trim and glue the excess to whichever side you designate to be the braid's back.
For the bun, start from the top of the braid's center and single crochet a circle (reference my photos). Sc another round, add a bit of stuffing, and dec all around. Finish off.
.
☆HAIR RIBBONS- black
.
For the bun ribbon: 18-20sc. Glue the center on top of the bun, the ends underneath.
For the bow ribbon: 70-80+sc; make it as long as you like. Then just tie it into a bow shape. You can cover the ends in a bit of nail polish so they don't get loose.
.
☆BELT- yellow(D)
.
30sc
.
☆HALO- yellow(D)
.
27sc. Insert a wire into the chain, and bring about a quarter of an inch out the other side. Curl the wired yarn into a circle, 1sc to tie the ends together, and hook that sticking out piece of wire onto the nearest loop of yarn. Then take the rest of the wire coming out from the other side and bend it into an 'L' shape so it can be attached the the head.
.
☆DRESS
These are the shapes I used. You could print it out and is it as a template, but I would recommend making your own since yarn and hook size will mean a lot in determining dress size.
Seal the ends of the fabric (nail polish or special fabric sealer for cotton, melting over a flame for polyester), and decorate the edge.
.
☆☆☆ASSEMBLY
.
Sew the body to the head- the longer part of the neck should be on the bottom and at round 8 (of the head). Sew the ears one round before the yellow patch, at eye level. Sew the arms pointing towards the eyes and mouth, and the legs at the bottom of the body. Sew the wings to the back. Glue the front part of the dress on, starting with the top, and line up the sides so they are straight (so that it fans out a little). Attach the back piece right below the wings, and glue the sides onto the front sides (tucking in any edges). Glue the long thin parts of the sleeves under where the arm is attached. Wrap the collar around the neck and glue the long thin parts where the sleeves are glued. Attach the extra black strip on the back between the wings. I took the pieces of chain and glued them to the center of the waist, brought them around each side and glued the other ends on the back. I added the belt around the waist, over the chain glue spots, to the back. Finally, I added the sequin cutout to the center of the belt.
Onto the hair! Glue the bang pieces one round into the yellow head patch, starting from the ear: 3 on the left, center, and right. Take the bun part of the braid and glue it onto the center of the head right behind the bangs, and secure the rest of the braid behind the respective ears. As for the locks, them right below the braid: 2 on the left, 4 in the center (between the wings), 2 on the right. Glue the ahoge on the left in between the bun and the bangs. Glue the center of the black bow right under the hair bun. Take the L shaped wire from the halo and insert it (with some glue, of course) into the bottom of the bun, so that it faces forwards. Finally, add the pink cheeks! I dabbed color pencil dust mixed with water using my finger.


 Thank you for giving my work a bit of your time!🙇♀️